
Microsoft routinely applies cumulative updates on the recently released Windows 11 operating system. Because the computer must be restarted after applying the update, these may not be the best settings for everyone. Furthermore, upgrades can occasionally disrupt the system’s smooth operation by introducing random defects that impede functionality.
If you don’t want the Windows 11 operating system to automatically install updates in your machine, you can change the settings. We’ll teach you how to deactivate automatic update installation in Windows 11 using the Services tool in this step-by-step instruction.

How to disable auto update installation in Windows 11
Step 1: Open the Run window on your Windows 11 computer. For this, press the Windows + R keys on your keyboard.
Step 2: When the Run window opens, type “services.msc” and then click on the Ok button.
Step 3: In Services, select the Windows Update service. You need to right-click on it and then click on “properties” to open the properties of the Windows Update service.
Step 4: Now, go to the general tab in the Windows update properties. From the drop-down list on the right side of the Startup type, select “Disabled”.
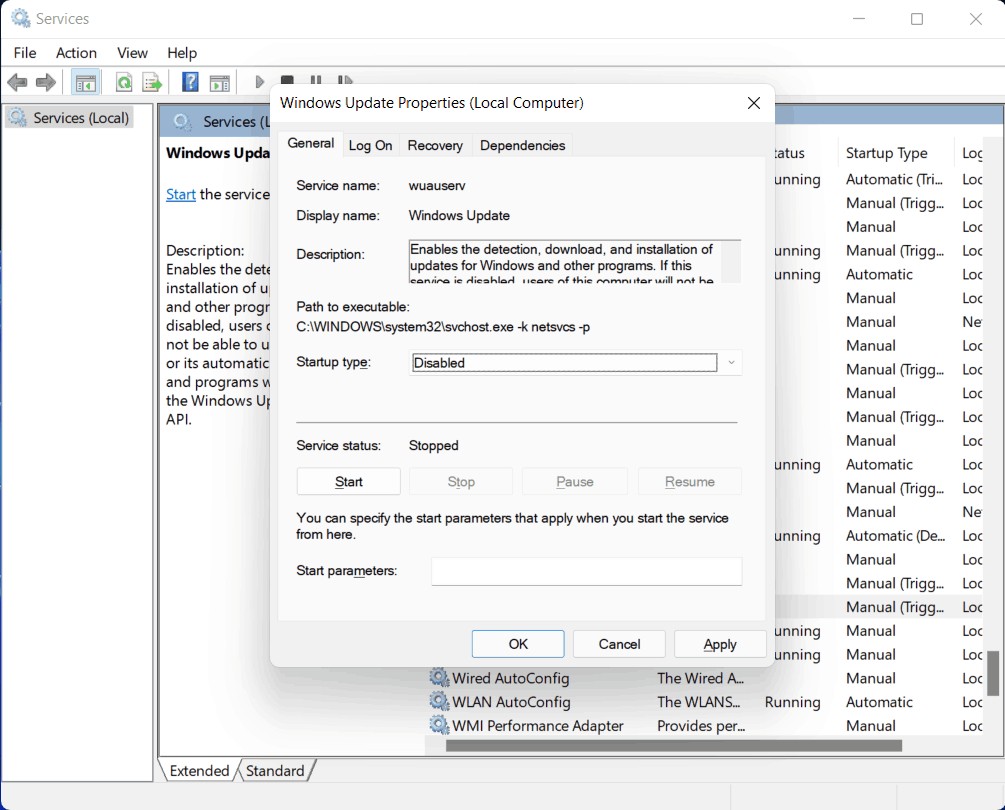
Step 5: Once you have made the changes, click on the “Apply” button, close the Services window and then restart your computer for the changes to take effect.
The automatic update placed on your Windows 11 PC will be deactivated when you complete this procedure. To undo the modifications, repeat the process and change the status from “Disabled” to “Enabled” in step 4.