
Microsoft has introduced the Windows Subsystem for Android (WSA) on the Windows 11 operating system, comparable to the Windows Subsystem for Linux (WSL).
If the WSA isn’t operating properly on your system and you want to reset it to factory defaults, you may easily do it via the Settings app on your Windows computer, which will also wipe all Android apps and their setup.
In this step-by-step instruction, we’ll show you how to restore the Windows Subsystem for Android (WSA) to its default settings on Windows 11.
How to reset Windows Subsystem for Android (WSA) in Windows 11
Step 1: Launch the Settings app on your computer. To do so, use the Windows + I keys on your keyboard.
Step 2: In the Settings box, select “Apps” from the left sidebar.
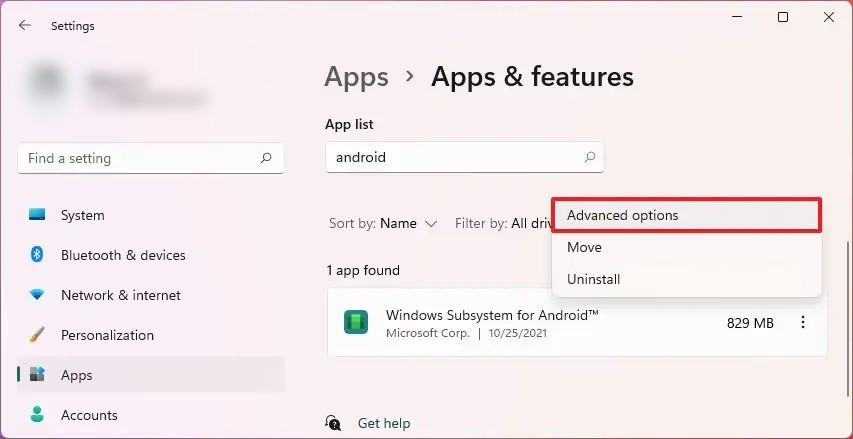
Step 3: After that, on the right side of the window, click on the “Apps & features” option.
Step 4: Select the “Windows Subsystem for Android” and click the menu (three-dotted) button on the right side and select “Advanced options”.
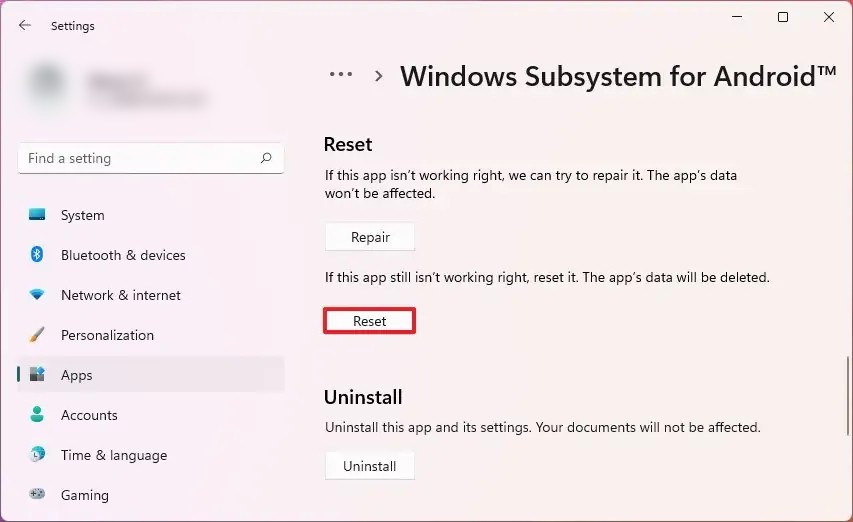
Step 5: Click on the “Reset” button and when asked for the confirmation, click on the “Reset” button again.
Once the preceding procedures have been successfully completed, the Windows Subsystem for Android will be restored to the factory default settings, which will resolve the majority of the frequent difficulties. If you reset the subsystem, you will need to reinstall all programs and change custom settings.