
Microsoft’s new Windows 11 operating system has a feature called Protected Password Sharing, which allows users to utilize a local login and password to access shared folders, public folders, and associated printers on the machine or the connected network.
This means that it is restricted to those who have a user account and password, and others will not be able to access such items on the device. To grant access to people who do not have a local account and password on the system, the password-protected sharing feature on the Windows 11 computer, which is enabled by default, must be removed.
In this step-by-step instruction, we’ll teach you how to disable password-protected sharing on your Windows 11 machine using Settings.
How to disable Password Protected Sharing feature in Windows 11
Step 1: Launch the Settings application on your computer. To do so, go to the Start menu and look for the Settings icon, or search for it. Alternatively, you may open the Windows Settings application by pressing the Windows + I buttons on your keyboard.
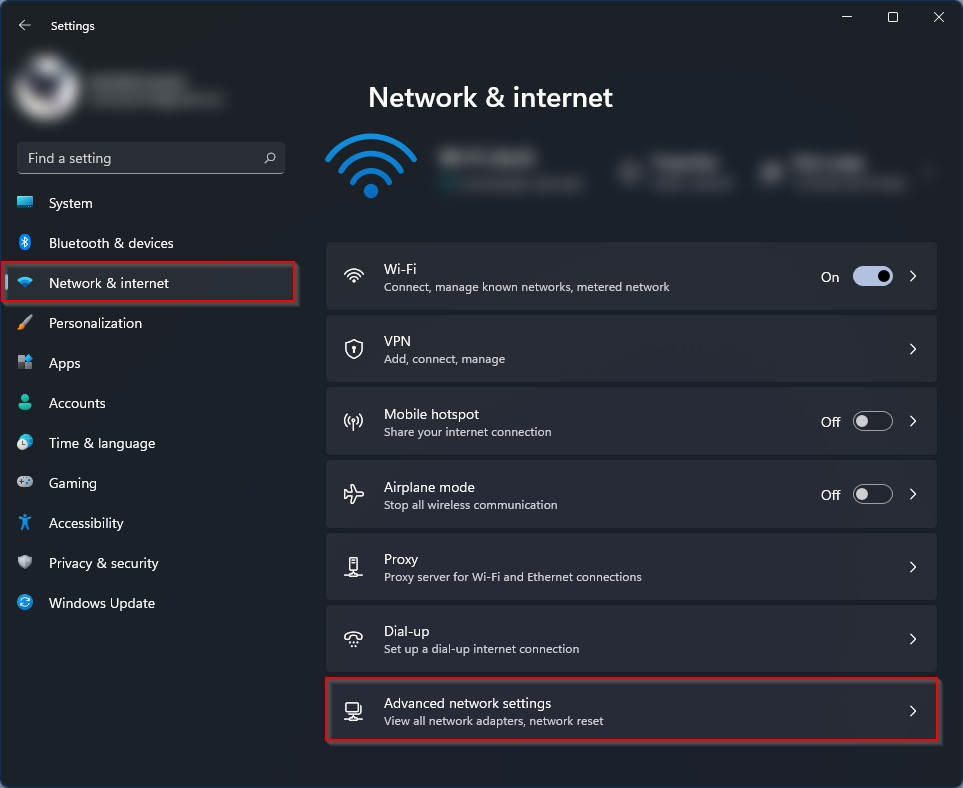
Step 2: When the Settings app loads, select “Network & Internet” from the left sidebar.
Step 3: On the right side panel, choose “Advanced network options.”
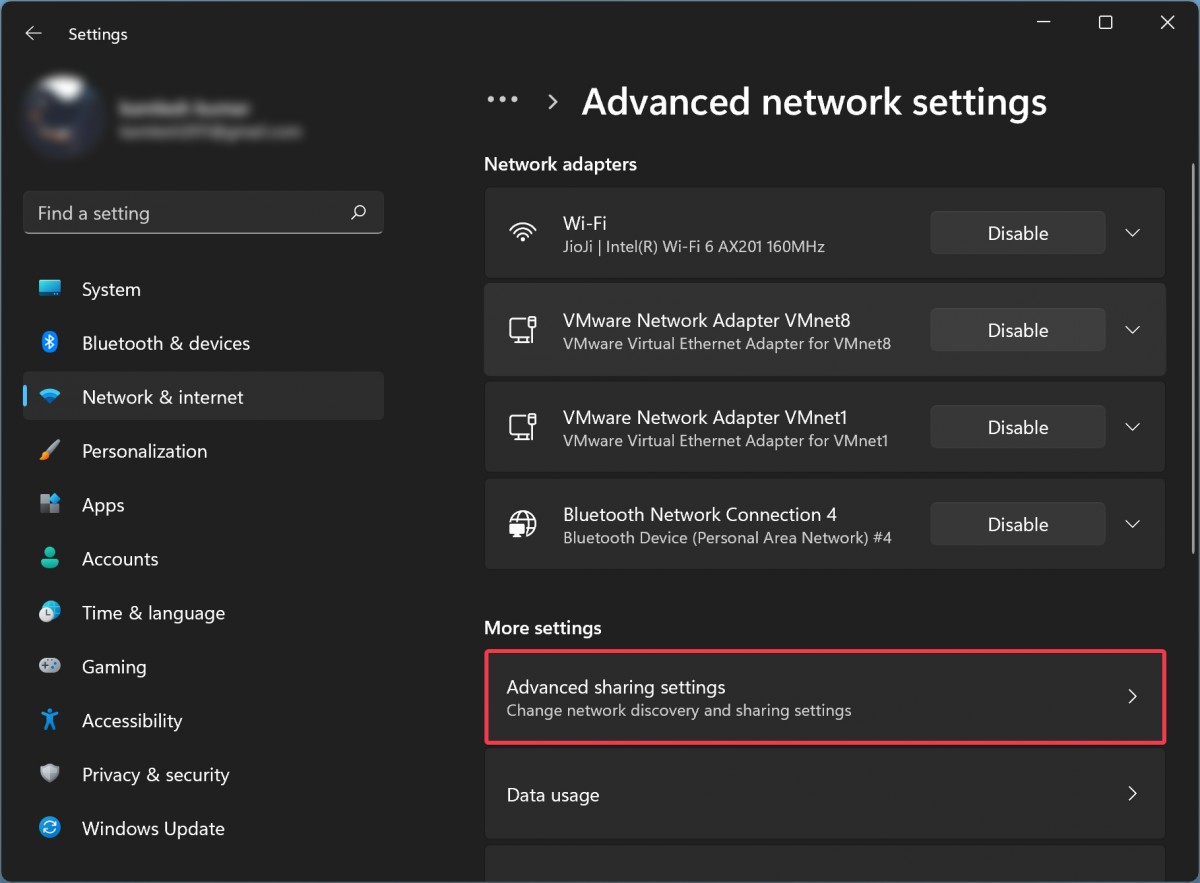
Step 4: In the Advanced Network Settings option, scroll down and select the “More settings” option and then click on the “Advanced sharing settings” option.
Step 5: Turn the toggle switch off for the “Password protected sharing” option located under the “All networks” section.
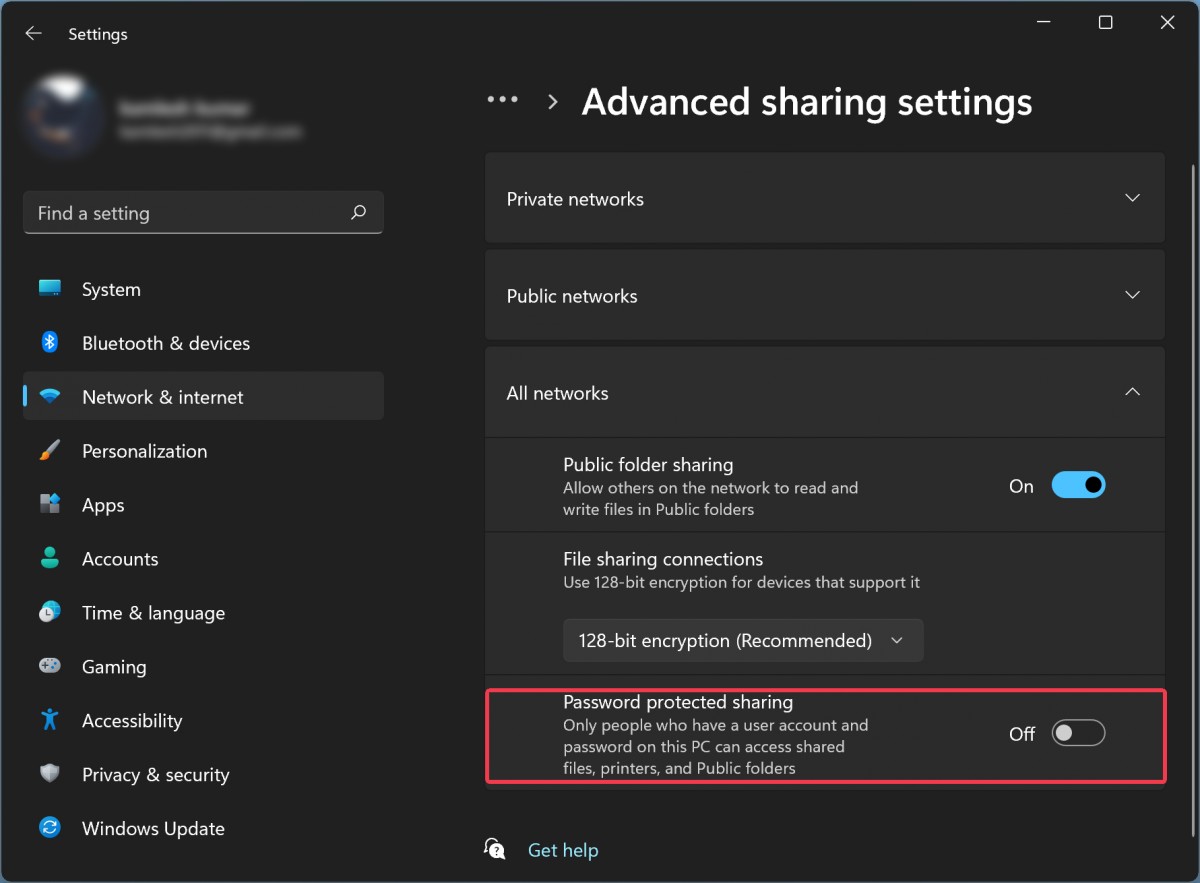
After completing all of the above procedures, the Password Protected Sharing function on your Windows 11 PC is disabled.