
The Startup feature in Microsoft Windows 11 is identical to that in previous versions of the Windows operating system. The feature, as the name implies, allows the specified applications to load automatically when the computer boots.
While the system’s needed applications are automatically put to the list, the Windows operating system allows users to change the settings so that other apps can be added to the list to load when the system boots.
In the Windows 11 operating system, there are numerous ways to activate application auto-loading. This post will walk you through the process of configuring apps to start automatically in Windows 11 using the Startup Settings option.
How to configure an app to start automatically in Windows 11
Step 1: Launch the Settings app on your computer. To do so, go to the Start menu and select the Settings app, or press the Windows + I keys on the keyboard.
Step 2: When the Settings app opens, select “Apps” from the left-side pane.
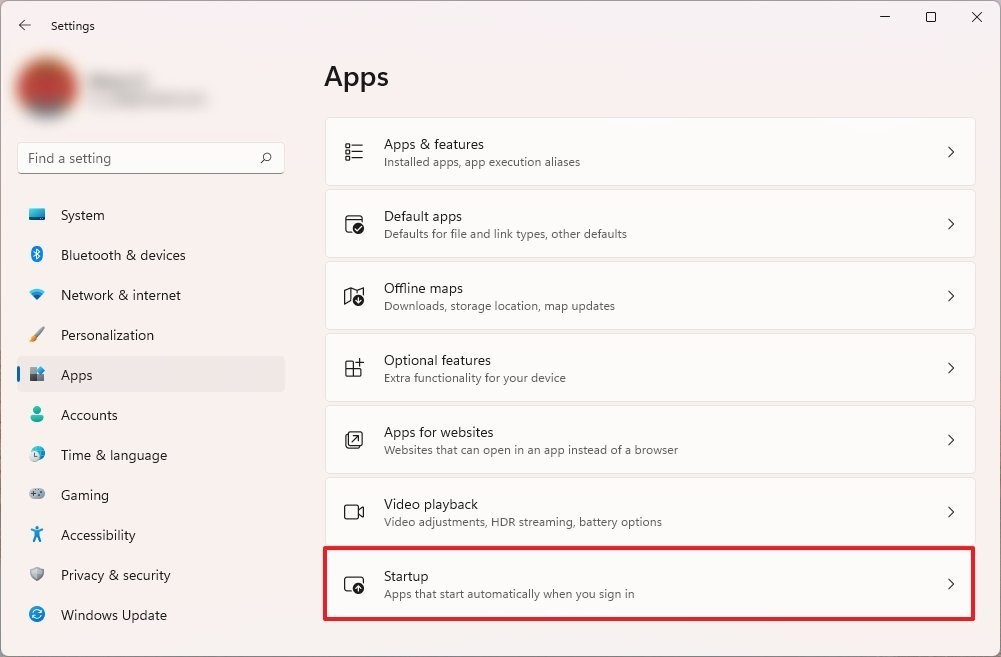
Step 3: On the right side pane, click on the “Startup” option.
Step 4: Now, for the application that you want to start automatically, toggle the switch to ON.
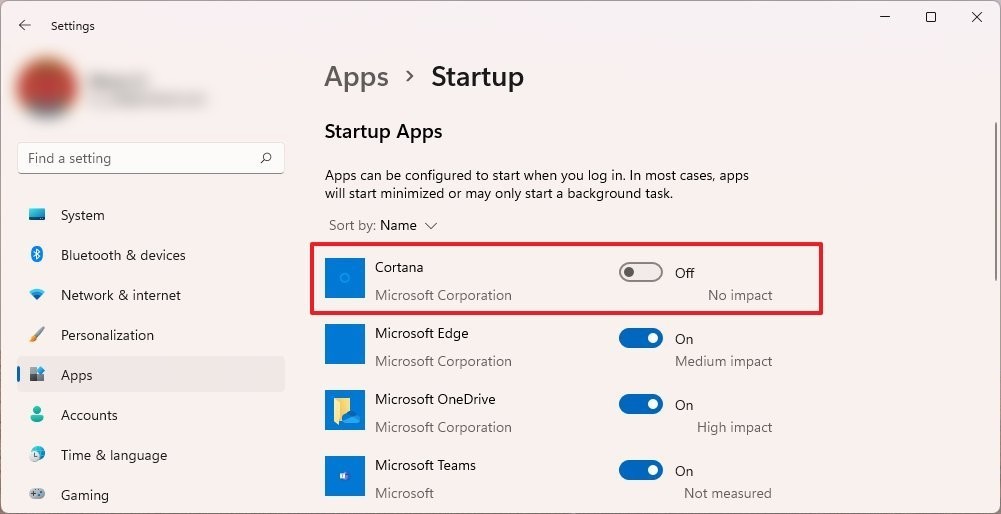
When the Windows operating system boots, the apps for which you enabled the toggle option will now load automatically. Please keep in mind that you will need to manually toggle the switch to the ON position for each of the programs you want to launch automatically after logging in to the system.