
Microsoft’s Windows 11 operating system has a feature that locks the screen on your computer, limiting illegal access to your computer data. This is useful if you are using a shared computer, have sensitive information on the device, or simply do not want others to use your computer.
If you don’t want to manually lock your computer screen every time you step away from it, you may program it to do so after a certain amount of inactivity. We’ll teach you how to configure the lock screen timeout on your Windows 11 computer to automatically lock the screen while the device isn’t in use in this step-by-step instruction.
How to change Lock Screen Timeout in Windows 11
Step 1: Open the Settings app on your Windows 11 computer. For this, either select it from the pinned apps in the Start Menu or search for it and select from the search results.
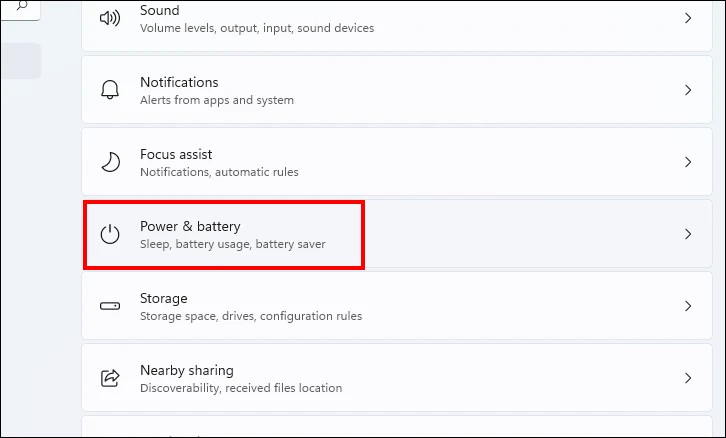
Step 2: In the Settings app, go to the “System” tab from the left-side pane.
Step 3: From the right side pane, click on the “Power & battery” option to continue.
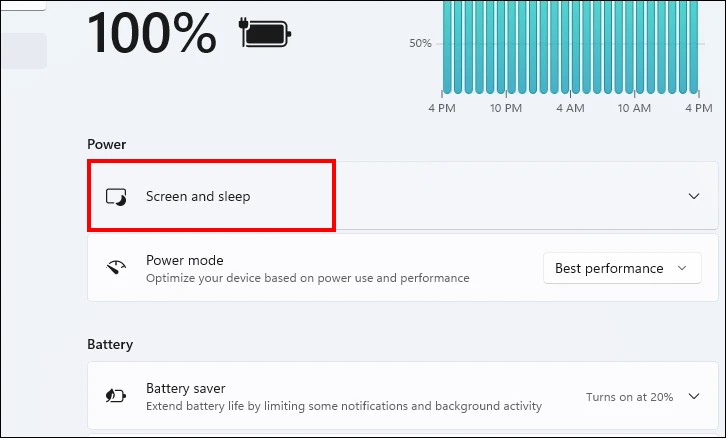
Step 4: On the “Power & battery” screen, under the “Power” section, click on the “Screen & sleep” tile to expand the section.
Step 5: Now, click on the drop-down next to the “On battery power, turn off my screen after” and select the time most suitable for you from the list.
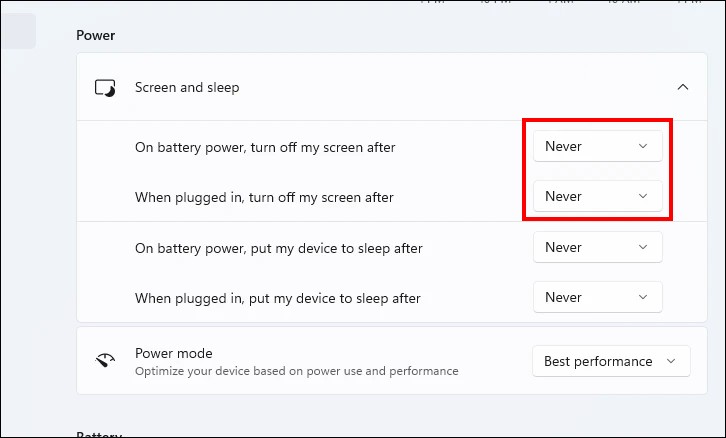
Step 6: After that, click on the drop-down menu next to the “When plugged in, turn off my screen after” option and select the suitable time duration to lock the device.
You have now successfully altered the timing for the lock screen timeout on your Windows 11 computer for both cases – when the laptop is powered on and when it is plugged in.