
The refresh rate is a crucial element that influences how the display is viewed. It is measured in Hertz (Hz) and essentially represents the number of times a picture shows on the screen each second. As a result, the faster the image changes or the screen refreshes, the more enjoyable and smooth the viewing experience.
The reduced refresh rate on the screen might cause issues such as screen flickering, which can cause headaches and eye strain. The default or most common refresh rate is 60Hz, however as higher refresh rate monitors become more popular, you may wish to modify it on your device.
In this step-by-step instruction, we’ll teach you how to quickly and easily change the refresh rate of your monitor or display while your machine is running the Windows 11 operating system.
Please keep in mind that in order to make these adjustments, your PC’s monitor must support a higher refresh rate.
How to adjust or change the display refresh rate in Windows 11
Step 1: Open the Settings application on your Windows 11 computer.
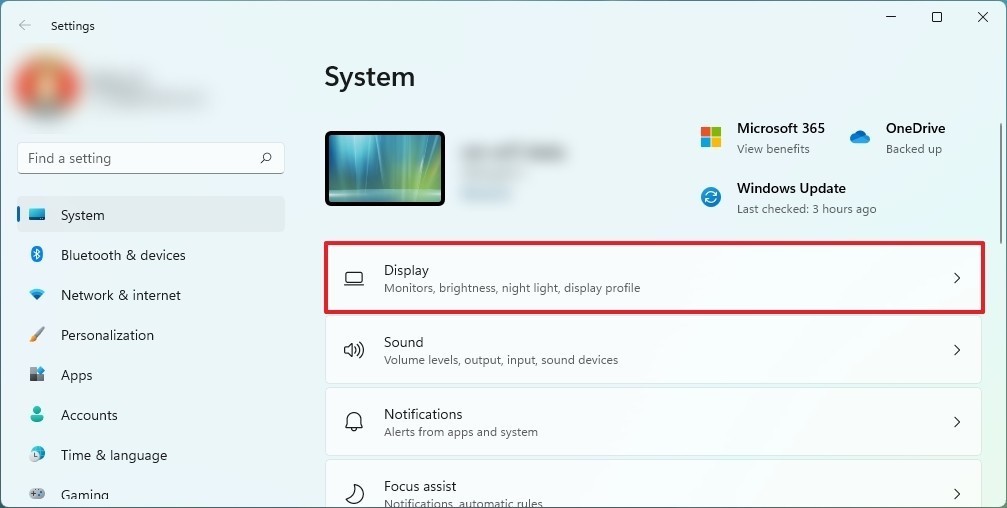
Step 2: When the Settings app opens, click on the “System” option.
Step 3: Now, select and then click on the “Display” option from the right pane.
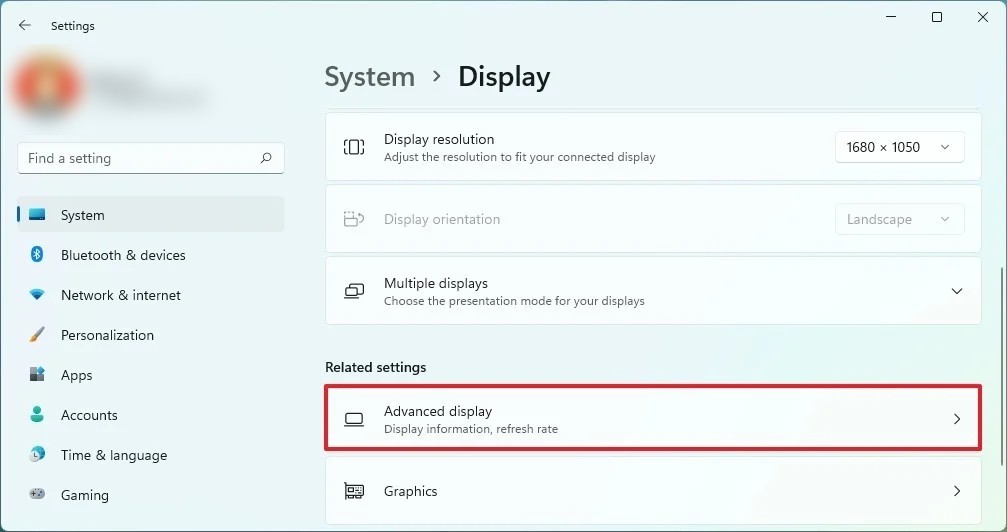
Step 4: Under the “Related settings” section, click on the “Advanced display” setting.
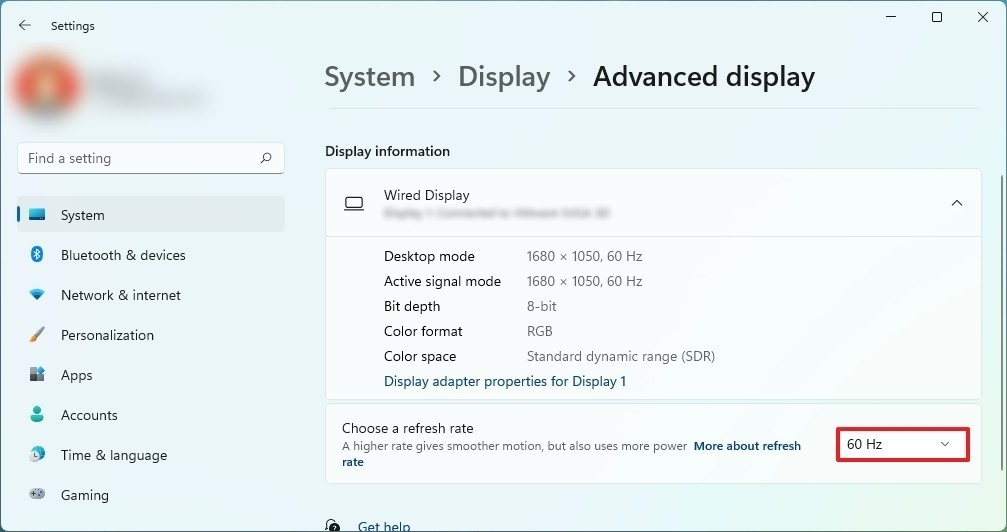
Step 5: Now, under the “Display information” section, select the refresh rate with the “Choose a refresh rate” dropdown.
That’s all. Following the steps in this article, you will notice that the system has implemented the new setting, and the display will begin using the new refresh rate. If you are not satisfied with the recently made modifications, you can always return to the preview settings.