
Legs are built into all PC mouse, and even more gaming-oriented mouse, to lift the entire lower portion of the mouse a little.
The purpose of these legs is twofold: first, they separate the mouse’s sensor from the surface, allowing it to focus better (this is especially important in optical mouse), and second, they favor a better glide on any surface, as they are usually made of Teflon (PTFE) or another very slippery material.
What’s the point of changing the mouse legs?
There are a variety of reasons why you might want to replace the feet on your mouse, the most obvious of which being that the gadget is no longer gliding correctly on the surface.
These legs are made of an extremely slick material that creates very little friction and hence has a low wear rate, but use is use, and they eventually wear down to the point where they can be nearly nothing.
The second reason could be because you’re unhappy with the mouse’s friction on your table or mat and wish to enhance it; for this, there are companies that sell various leg kits that promise to be far better than those that come standard with the mouse…
We’re not going to pass judgment on that right now, but many individuals have chosen these third-party solutions to improve the ease with which their mouse glides across the mouse pad.
The third reason has less to do with modifying and more to do with simply “removing”; in most mouse, the manufacturer “hide” the screws that allow us to access the inside of the mouse behind these sliding feet, so we’ll have to remove them to get to the screws that allow us to open the mouse (whether to repair something, to clean it inside, etc.).
This is the most common explanation, and you also don’t want to damage the original legs so they can be replaced.
Is it done on a regular basis or under what circumstances?
When you find that the mouse is no longer sliding as smoothly as it should, check the bottom of the device to see if the legs are not equally worn, even if some of them have come to nothing.
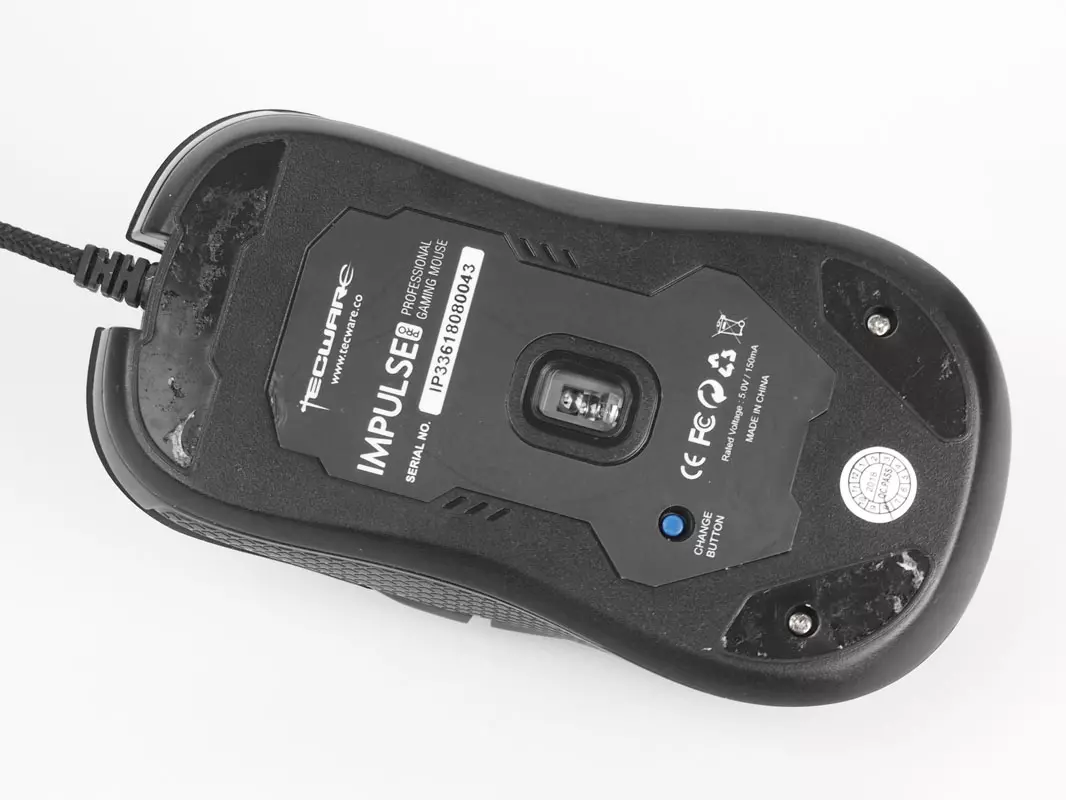
Similarly, as previously stated, you may want to open the mouse because, as seen in the image above, the manufacturer usually always hides the screws behind these legs, and we must remove these legs to access them…
We are in this scenario.
To be able to put them back in their proper location, it is critical that they are not reformed or damaged, and this is when you must take extra caution.
How to swap the legs of a mouse without breaking it

The simplest and most direct way to remove the mouse legs, but also the wrong way, is to pry and literally tear them off with a flat tool, such as a screwdriver. However, as you can see in the image above, this will deform them, and putting them back in place to continue using them will be difficult.
What are the issues?
Simple: they won’t be perfectly flat anymore; they’ll have bumps, ridges, and valleys, and they won’t glide the same way.
Furthermore, because the mouse will not be at the same distance from the surface at all of its places of support, these protrusions will cause the mouse to limp.
Always be careful when removing the mouse legs in this manner unless you’re replacing them with new ones, as the old ones will be nearly worthless.
The correct approach to do this is to heat the area of the feet with a hair drier while the mouse is detached (obviously) to release the glue.
It’s critical that it’s a hair drier or another source capable of swiftly applying heat to the legs, but not so much that it melts them (therefore do not even think about leaving the mouse on a radiator because then you could damage it).
The appropriate device, once again, is a hair dryer.

Be patient, avoid pointing at the sensor, and avoid using too much heat.
Normally, after approximately 20 seconds of pointing at each leg, you should notice that the leg will move by itself if you touch it with a screwdriver (we do not advocate doing it with your finger because the surface will be rather hot).
This indicates that the adhesive is soft, and you may now remove the Teflon leg by pulling up on it.
Normally, you can do it with ease with the help of a flat screwdriver, but it shouldn’t be too difficult with your fingers (if you wait 10-15 seconds after removing the dryer, it shouldn’t burn you).
After you’ve removed the mouse’s original Teflon legs, you can swap them out for new ones, access the screws if you need to open it, and whatever else you need to do.
When removing the original legs, be careful not to leave them face down on any surface; instead, leave them with the adhesive facing up to avoid getting stuck somewhere else.
To put them back on, simply heat the legs with the dryer for a few seconds (this time 5-10 seconds should be enough to soften the adhesive again) and position them in place, pressing firmly to ensure they are perfectly fixed again.